
Getting Animation from blender to UE4
- ychen3129

- Aug 18, 2021
- 2 min read
I'm a Blender Noob learning the basic today.
Following are Notes from Gordon Vart's tutorial
Link: https://youtu.be/AEmz-1RQDoQ
setting the unit right:
Unit scale: 0.01
Length: centimeters

Let's do some modeling
go to modeling tab
change to face select mode
select the top face

To create a pyramid
select mesh tab>merge> at center


Go to x ray mode

select the top edges, ctrl+ E for subdivide

Set the number of cuts to 10

When we done with modeling, go back to layout mode

go to front view
Since we still have transform information, we want to apply transform to the model
go to object, apply,

Location and rotation is set to 0, scale is back to 1

Set the origin to 3d cursor

Now, we want to add armature/ skeleton to the mesh

To show the bone, go to object data property, viewport display: check in Front
The armature is too small to see, let's scale it up

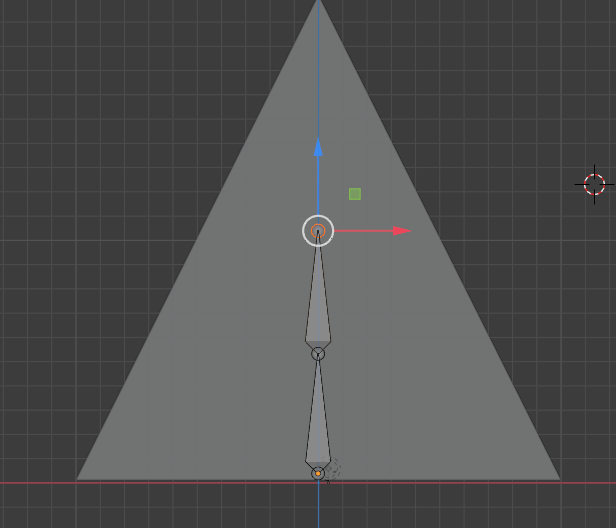
lets add more bones, go to modeling tab, hit 1 to front viewport
select the top of bone, hit E for extrude, hit z for extrude along z direction,place the second bone

Select the armature, go back to layout tab
Object>apply> all transform

Parent your mesh to your armature
Select your mesh, shift select your bone
do parent, automatic weights

select your mesh, go to weight painting mode


Let's begin animate, go to animation tab
select the bones, go to pose mode

select all the bones

Go to object data property
pose library tab, add new
hit + to add the initial pose

turn on auto key if you wish

to add our first pose to timeline
hit apply pose library pose button


apply the pose again in the last frame, so the animation would loop without snapping
add some animation inbetween
Tip: hit T to bring up the tool bar

Go to action editor on your timeline

rename your clip: idle, hit the fake user button

Now we have the animation
It's time to bring it to UE4
Back to layout tab, Select the mesh
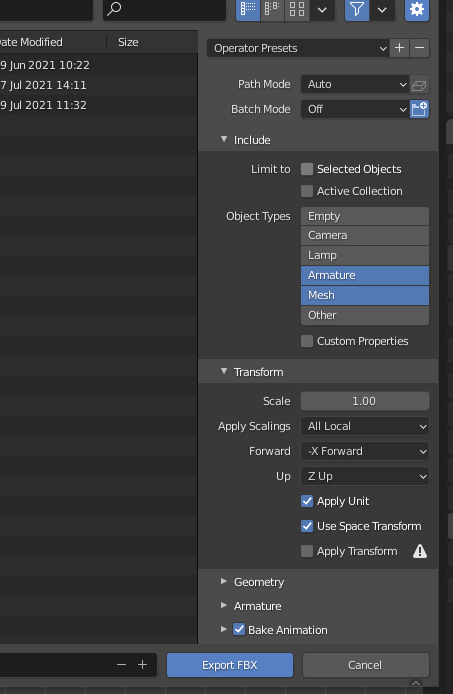
Go to File>export> FBX

in the export setting
only select Armature and Mesh, Forward: X forward, UP: Z up
hit export FBX
Let's import the FBX to Unreal engine
make sure skeletal mesh, import mesh, import animations is selected


All Set


Comments